Blade Assembly

01 Install the blade

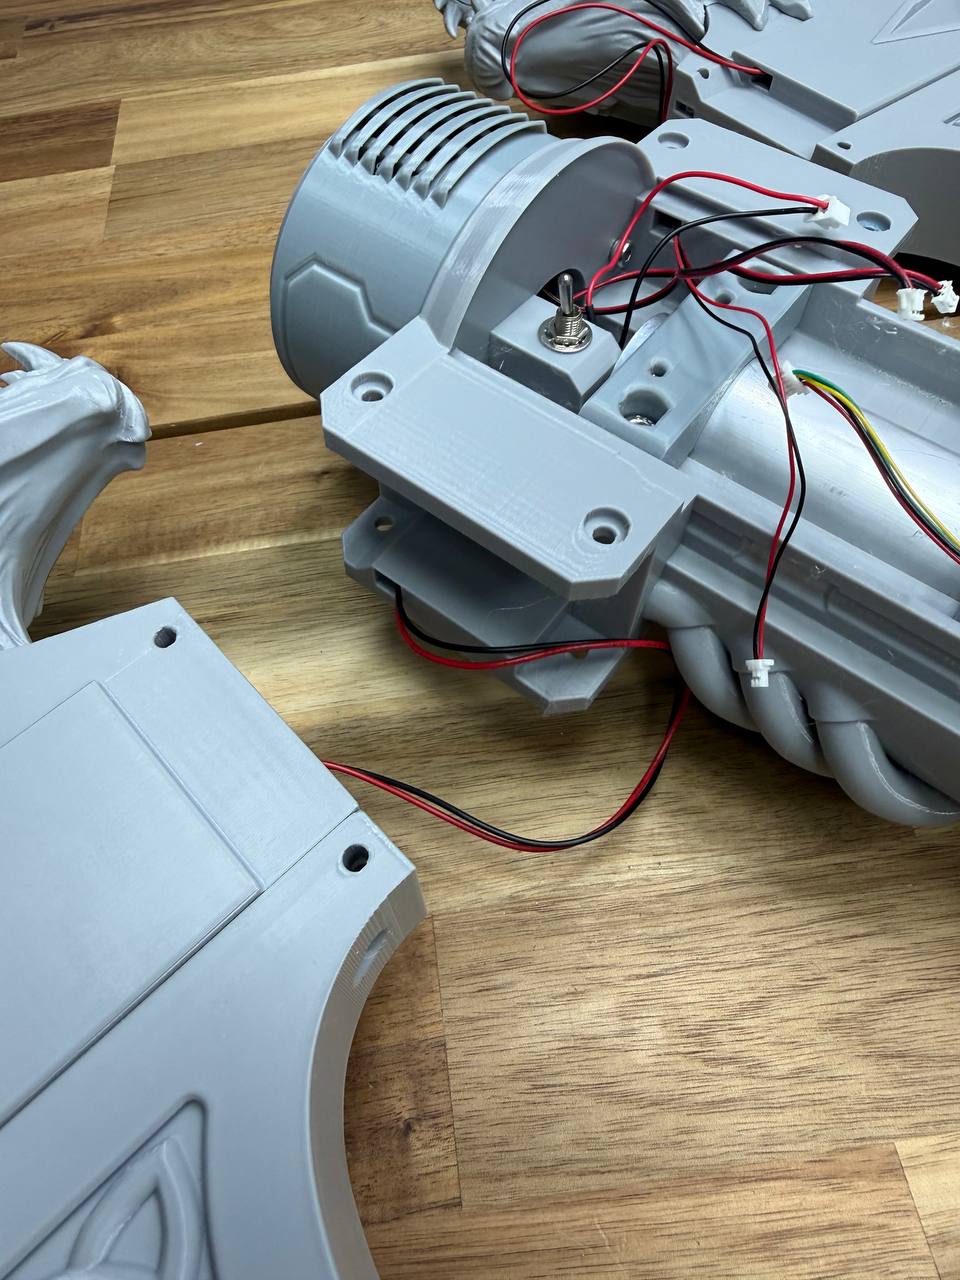
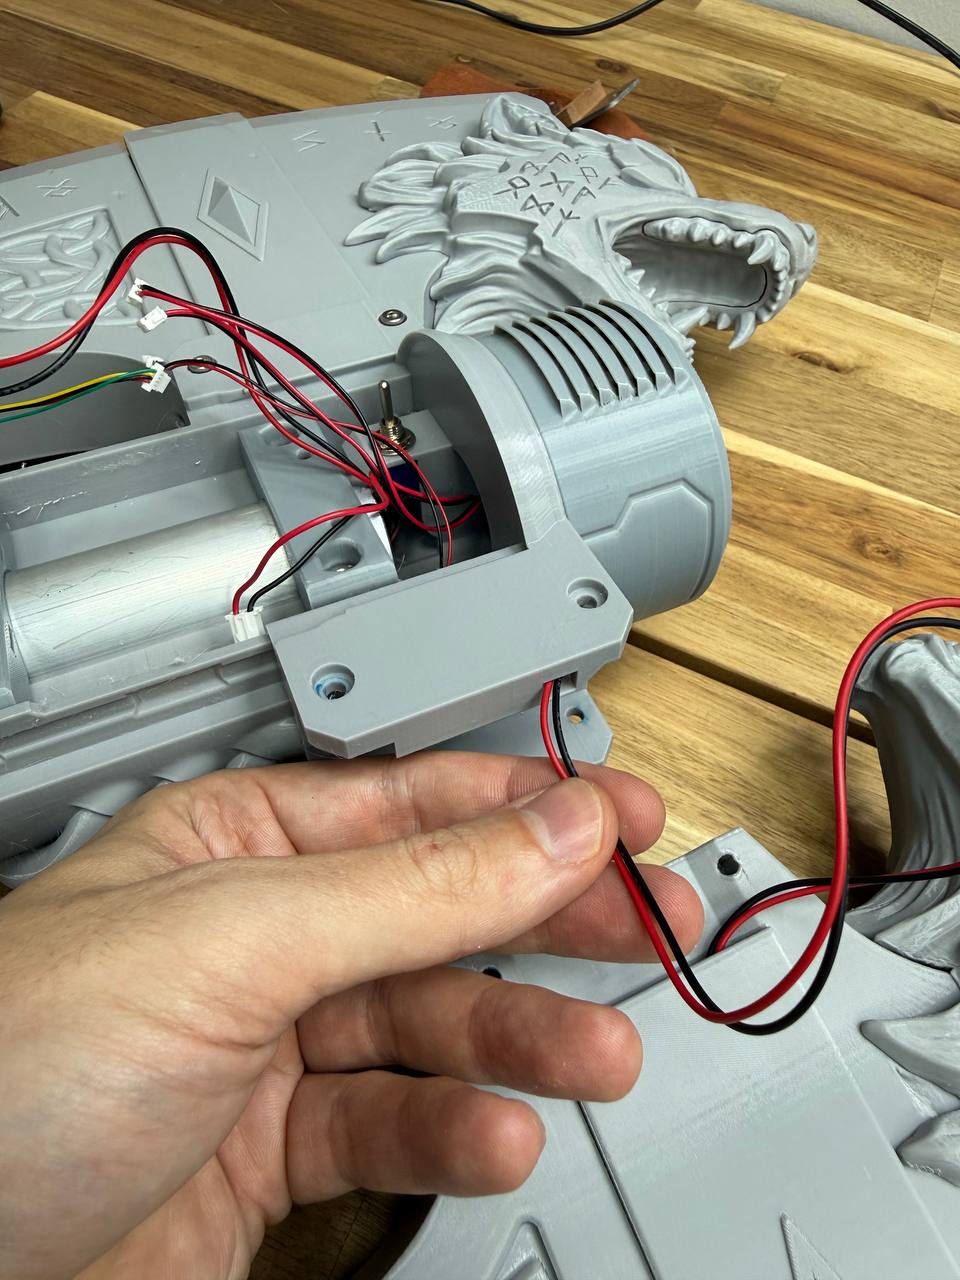
Thread the motor wire through the main body so it comes out the other side. Seat the blade into the body and secure it with four M4x20 screws — two on each side.

01 Install the blade

Insert the assembled chain elements into the blade guide, teeth facing outward. Push the chain forward until it reaches about halfway around the blade.

Then tilt the axe with the blade pointing downward at a slight angle to the horizon — this lets gravity pull the chain along the guide rails. Keep pushing until the chain comes out and advances along the lower part of the guide. Once it emerges, use your hand to pull it the rest of the way around to the bottom edge of the blade.

To close the chain loop, press it against the tensioner to create enough slack, then connect the two ends by snapping the chain links together. Press firmly on the link until it clicks into place.

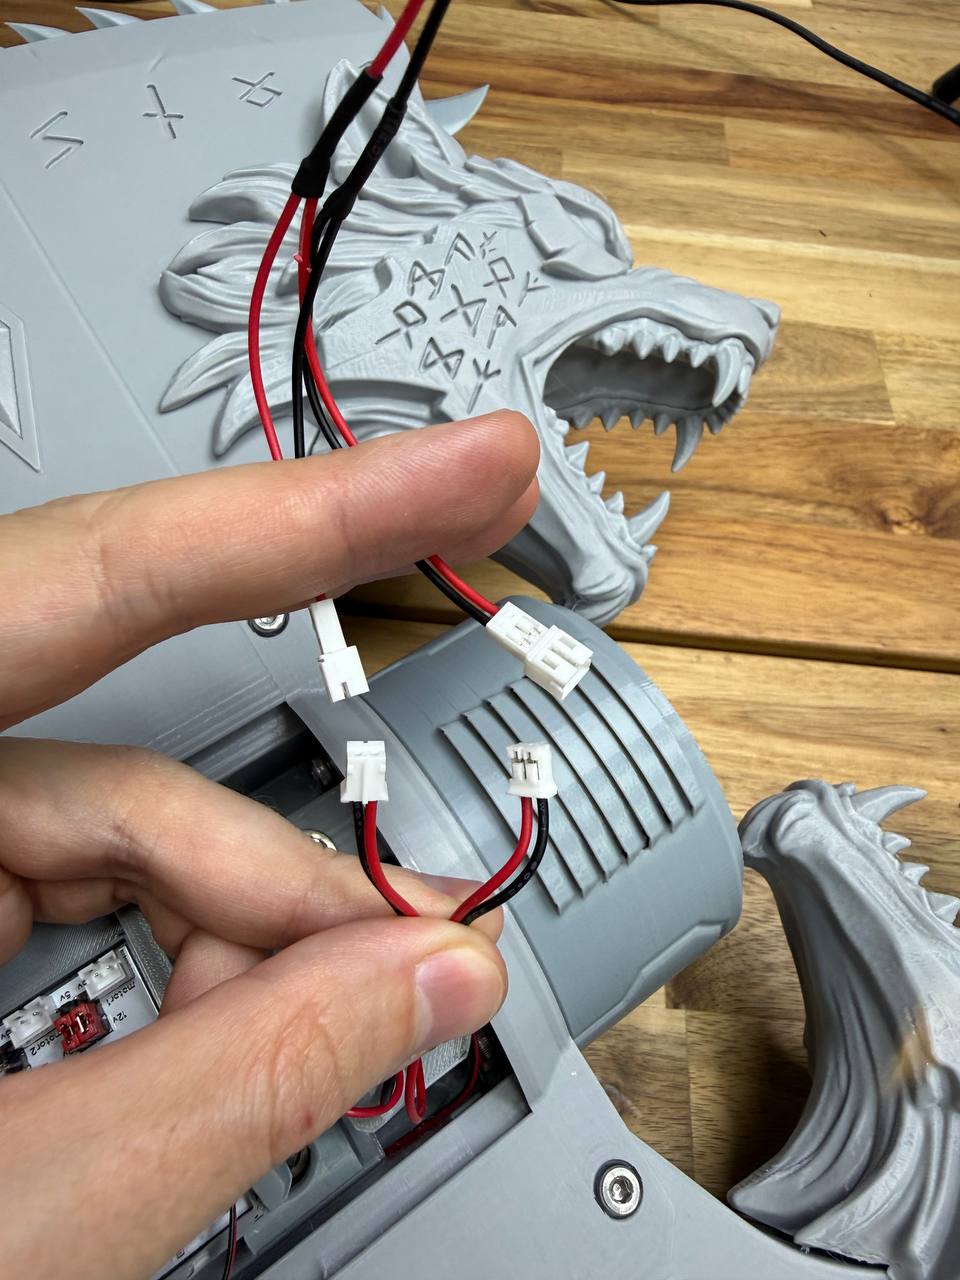
07 Connect the motor

Thread the motor cable (medium-sized connector) through the same channel as the speakers and power cable. Insert it into the Motor1 port.

Basic operation

01 Insert batteries and power on

Take three standard AA battery holders. Insert the batteries with the negative (−) end on the spring and the positive (+) end on the flat contact — the same way you would insert batteries into any device. Assemble three holders with three batteries each.

Insert the battery holders into the battery compartment as shown in the photo, with the spring (positive) side facing toward the positive (+) contact of the compartment. Insert all three, then slide the battery compartment into the handle and secure the end cap.

02 Test the device

Turn on the device using the power switch shown in the photo. You can now control the motor by pressing either the upper or lower trigger button — both will activate the chain. If you built the single-button option, only the upper trigger will function.

Mobile App Guide

This section applies to the Alex Geek Board Kit builds only.

01 Connect to your device

Your device will appear in the list of available Bluetooth devices. Tap on it to connect. You will be taken to the main device screen.

02 Telemetry

At the top of the screen you will see live telemetry data: current (A), voltage (V), and power (W).

03 Battery setup

Below the telemetry you will see the battery charge level. It is important to select the correct battery configuration for accurate charge percentage readings, as different battery types have different voltage ranges.

Axe Battery OptionsSword Battery Options
9× AA Lithium8× AA Lithium
9× AA NiCd (Nickel-Cadmium)8× AA NiCd (Nickel-Cadmium)
3× 18650 Lithium3× 18650 Lithium

Select the option that matches your actual battery setup.

04 Motor control

You can adjust the motor RPM speed and reverse the rotation direction.


05 Audio control

You can adjust the device volume level from within the app.

06 Firmware update (OTA)

If a firmware update is available, you will see a notification at the bottom of the screen along with a brief changelog. To update:

  1. Tap Update Firmware
  2. A Wi-Fi credentials dialog will appear — enter your Wi-Fi network name and password. The board will connect to this Wi-Fi network to download the new firmware from the internet.
  3. Tap Connect & Update
  4. The download will begin. You can also monitor the progress on the prop's OLED display.
  5. Once the download and installation are complete, the app will return to the initial scanning screen. Reconnect to your device.

Note: a new firmware version may require an updated version of the app. Make sure to keep the app updated as well.

Painting

This section is currently under development. A more detailed painting guide may be added in the future. Below are the key points to keep in mind when painting your axe.


⚠ Important — protect moving parts

Do not apply primer or paint to the chain, chain guides, or any moving surfaces. Paint is a sticky substance — if it gets on the guide rails, the chain will stick or rotate poorly due to increased friction between the links. This can lead to motor overheating and potential electronics failure.

Before painting, cover all internal surfaces and guide rails with masking tape. If paint accidentally gets on the guides or chain, make sure to thoroughly clean it off. The chain must rotate freely and slide along the guides without resistance.


Painting the chain

Paint the chain elements either separately before installation, or very carefully while installed — making sure that primer and paint do not get inside the links where they slide against each other.


Surface preparation

Sand the plastic surface before painting to improve adhesion. You can then apply a filler primer or automotive putty to smooth out layer lines.

An excellent alternative for smoothing print layers is UV resin. Apply a thin coat of photopolymer resin to the surface, then gently heat it with a heat gun or torch to remove air bubbles. Cure it under a UV lamp. Sand away any drips or uneven spots, then apply primer followed by paint.


Paint options

You can use acrylic craft paints or automotive spray paints. I typically use FolkArt acrylic paints — they come in larger bottles compared to modeling paints, making them a good option in terms of both price and quality. Spray cans also work well, especially for base coats and large surfaces.

Always apply primer before painting, regardless of which paint type you choose.